7 Easy Steps to Writing Your First C# Unit Test

Unit tests are typically the simplest form of automated test.
Their aim should be to check the basic input and output of isolated units of logic. Because of their simplicity (relative to other types of tests), they are usually the fastest type of test to write and run. As they test components in isolation, there’s no guarantee that an entire workflow will function correctly when multiple components are chained together.
But this is not the goal of a unit test – there are other types of tests for that.
In addition to giving confidence that the basic building blocks of our program are working, writing unit tests has another benefit. It’s difficult to write tests for modules that have been put together in complex ways. Struggling when setting up a test could be a sign that we need to refactor our code. Over time, we learn how to design our modules to be testable, which often means a simpler design.
So how do we write a unit test?
1. Choose a Framework to Use When Writing Tests
There are plenty of test frameworks available in C#. Listed alphabetically, three of the most popular are:
MSTest
NUnit
xUnit
These frameworks are similar in functionality. A high level comparison can be found at BrowserStack, but we will use NUnit in this tutorial.
2. Create a Separate Project for Your Tests
It’s a good idea to keep tests separate from the main code. When adding a new project to our Visual Studio solution, we should be able to find a template for a test project using our chosen framework. In Image 1, we can see templates for MSTest, NUnit, and xUnit Test projects.
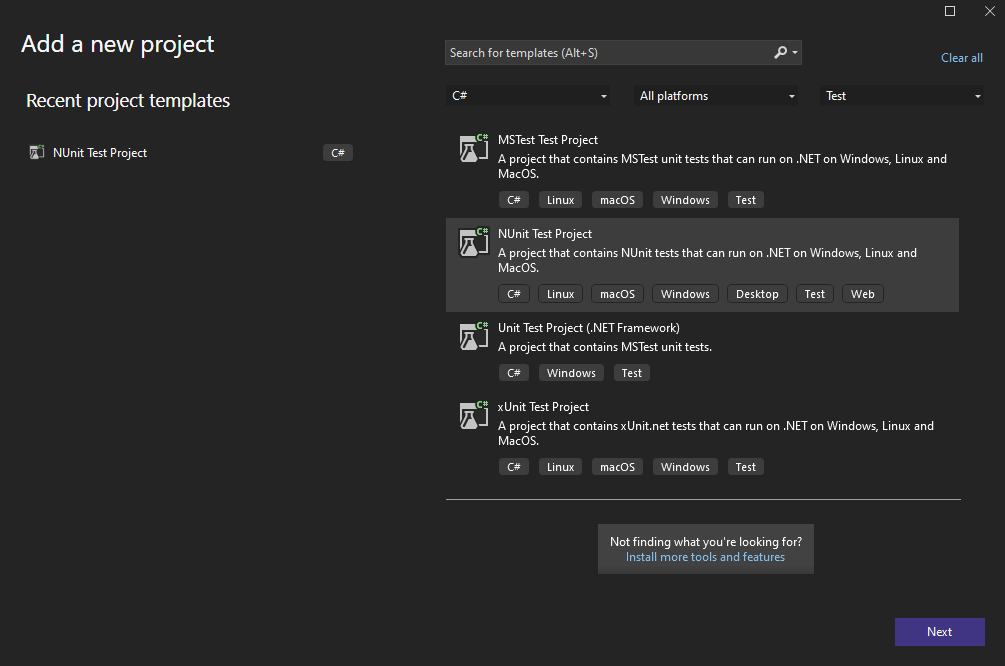
Image 1: The New Project dialogue in Visual Studio 2022
The naming convention I use is to give the test project the same name as the actual code project, but with Tests added at the end. Feel free to use whichever naming convention you are most comfortable with.
3. Identify the Components in a Solution
Let’s say we want to build a simple C# app that calculates the hypotenuse of a triangle. We want to calculate:
$$\sqrt{a^2 + b^2}$$
Don’t worry if that looks complicated – we just need to do three things:
Find the square root of a number. This will be used in the final step.
Multiply a number by itself to find its squared value.
Add two numbers together.
To demonstrate how we’d go about writing unit tests, we’ll focus on one aspect of the formula only: finding the square of any given number. We want to eventually write a new class called MultiplicationService, which should have a method that will multiply a number by itself.
4. Create an Empty Test
Firstly, let’s create a new test class. As we want our new class to be called MultiplicationService, let’s call our test class MultiplicationServiceTests. Then let’s create an empty test with a name that conveys its intention:
public class MultiplicationServiceTests
{
    [Test]
    public void MultiplicationServiceCanSquareNumber()
    {
        // Arrange

        // Act

        // Assert
    }
}
Here we’ve created a new method named MultiplicationServiceCanSquareNumber. To indicate that this is an NUnit test, it’s been decorated with [Test]. You may need to use a different attribute if you’re using a different testing framework.
We’ve also added three comments. We’ll put the corresponding sections of the unit test under each comment heading. Use of comments is optional. I like them as section headings, but it’s possible to write tests entirely without comments if that’s your preferred coding style.
5. Fill in the Test Steps
Now let’s fill in the missing sections of the test:
[Test]
public void MultiplicationServiceCanSquareNumber()
{
    // Arrange

    var service = new MultiplicationService();

    // Act

    var result = service.Square(3);

    // Assert

    Assert.That(result, Is.EqualTo(9));
}
In general, it’s best to limit a test to performing one action, i.e. having a single line of logic in the Act section. While there is no rule against having more, doing so can lead to tests that do too many things at once. Ideally, we want our test results to act as a dashboard that we can use to pinpoint any problems.
6. Write the Code
When doing TDD, now is the time to add the actual implementation; be sure to check that the test compiles but fails in the first instance. Discussing the advantages and disadvantages of TDD is outside of the scope of this article.
Regardless of when the implementation is written, it’s a good idea to check that the test will fail if the output is wrong. This will show that our test is reliable.
For this example, we will use the following simple implementation:
public class MultiplicationService
{
    public int Square(int number)
    {
        return number * number;
    }
}
With that out of the way, let’s run our test!
7. Run the Test
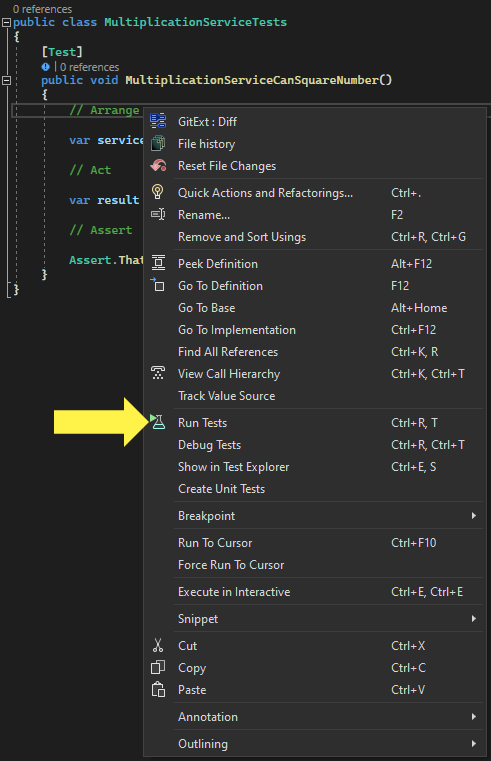
Image 2: The menu when right-clicking within test code in Visual Studio
Image 2 shows the menu when right-clicking within our test code in Visual Studio. Select Run Tests to run the test without debugging. If the test fails and we want to see where things are going wrong, we can choose the Debug Tests option, which will allow us to use the debugger to help fix things.
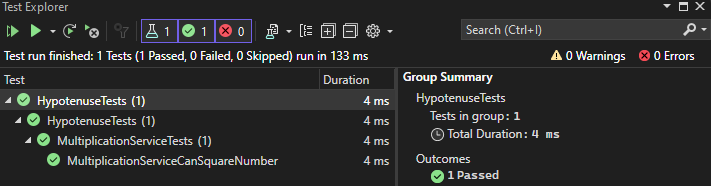
Image 3: The Visual Studio Test Explorer
Once run, we should see the results in the Test Explorer. It should look something like Image 3.
Summary
We can write a unit test in seven easy steps.
Choose a Framework to Use When Writing Tests.
Create a Separate Project for Your Tests.
Identify the Components in a Solution.
Create an Empty Test.
Fill in the Test Steps.
Write the Code.
Run the Test.
Writing unit tests can help you in many ways. Primarily, they give you confidence in your code. Once written, you have a quick way to check whether any future changes have broken existing functionality. This is especially useful when refactoring.
More subtly, they offer insight into your program’s design. If things are difficult to write tests for, it could be a sign that some components could do with refactoring.
Writing your first unit test might feel a little awkward, but it gets easier with each test that you write. And with the benefit of making your code more robust while learning to improve its design, there’s no better time to start than now.


